5 Tips For Better Real Estate Photos

 These days if you want to sell your home quickly, you need to get your listing on the internet. The problem though with that is you have to compete with many other sellers who’ve had the same idea. To attract enough buyers, you need to make your listing photos really stand out.
To do that, it’s worth investing some time in producing a few top-quality photos of your property. Great curb appeal is a vital aspect in attracting buyers and many real estate agents consider it very important in the selling process. Having high-quality photos that show your property in the best possible light, will give you an extra advantage over competitors and would lead to a faster sale.
Here are five real estate photography tips:
- Right Equipment. Having the right equipment will make a big difference in how the final shots come out. If you don’t have access to a DSLR camera with a wide-angle lens, then you can rent them for a day from most photography stores. For good real estate photography, you’ll definitely need a wide-angle lens (10-20mm). This will allow you to frame the entire exterior property in one shot and allow greater perspective of each individual room. A camera with a good ISO performance is a plus, as it will allow you to take better photos in less light. Another handy piece of kit is a tripod. This will allow you to take slow-exposure shots during the twilight hours, when the sun has just gone down and the lights have come on, making for a perfect listing shot.
- Room Preparation. Before you can begin photographing each room, you’ll first have to prep it. This means decluttering it of anything that makes it look messy or disorganized. New sheets should be placed on every bed, the carpet or hardwood floor thoroughly cleaned and any noticeable marks or dust removed. Every room you plan on photographing must look clean and presentable.
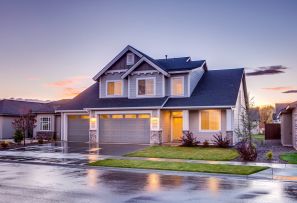
- Photo Shoot Planning. For exterior shots, the best time to photography is either in the early morning or late afternoon. This is known as the golden-hour, the half-hour before and after the sun has set or risen. This kind of light creates a soft golden shine that makes anything photographed in it look dazzling. For best effects, it’s important to try back-lighting each shot, meaning each shot is taken with the sun behind the photographer, doing otherwise will result in blown out photos. For interior shots remember to focus on the room, not the furniture. You’ll want viewers to get a good sense of the room, so include as much of it in each shot as you can. Photograph at a time when the light is softly passing through the windows, avoid hard light where the contrast between light and dark areas is too strong. Having a tripod will allow you to plan the shot better by letting you change things as needed and frame correctly.
- Photo Enhancement. Once you have your photos, you’ll need to upload them to a good image editing software such as Lightroom. This will allow you to increase the vibrancy, clarity and increase or decrease the lights and shadows.
- Copyright. Uploading photos online puts them at risk of being stolen and used by someone else. To protect your photos from online theft, have them copyrighted with a watermark, you can do this with an image editing software like Photoshop or Lightroom.
No amount of money will ever compensate for good photographic skills. Take some time to learn how to use your camera and how light and composition work together. It will make your final photos look much better and you’ll learn a new skill.